Pages

Showing posts with label OCR. Show all posts

2024/05/22

Free OCR add-ons for Chrome and Firefox - Windows

Some developers build an add-on for multiple web browsers but some add-ons are available for one web browser.

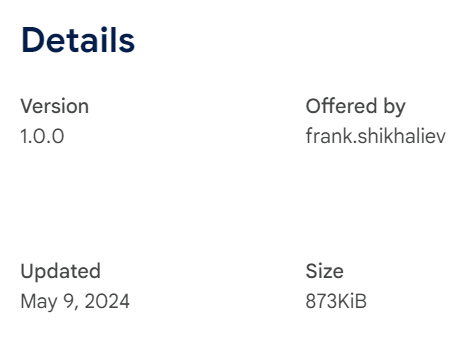


I put many add-ons to the test and got the best ones for Chrome and Firefox. The best one for Chrome is not available for Firefox, but The best one for Firefox is available for Chrome.


If you ask me which is better, I must say 'Image to Text' offered by frank.shikhaliev. It is for Chrome.

Not every picture I tested, was inserted in this post. Let's start with Firefox's add-on.

The test steps -  Copyfish 5.1.9 by UI Vision RPA Software
OS: Windows 11 Home
Install from Firefox's add-on website: https://addons.mozilla.org/en-US/firefox/addon/copyfish-ocr-software/


1. If you want to know how to install it, just read my previous post 'CopyTables - Copy Tables in Webpages Easily Free on Windows'.

2. The add-on icon at toolbar.


Click the icon, a mouse pointer will turn to a plus sign.


Drag to draw a target area.

A new window shows you an extracted text.

I clicked 'Copy to Clipbord' and pasted it to other app.

CopyFish extracted text from the image above.


The test steps -  Copyfish 5.1.9 by UI Vision RPA Software
OS: Windows 11 Home
Install from Firefox's add-on website: https://addons.mozilla.org/en-US/firefox/addon/copyfish-ocr-software/

Let's see outputs of 'Image to Text' on Chrome.

The test steps -  Image to Text 1.0.0 by frank.shikhaliev
OS: Windows 11 Home
Install from Chrome web store website: https://chromewebstore.google.com/detail/image-to-text/jfpipjgidnagjbmdfhogcoklclacgnhk?hl=en

1. Go to a link above and click a button 'Add to Chrome'.


A pop-up window shows, click 'Add extension'

See the picture below. Click an icon then pin an add-on to toolbar.

The add-on icon at toolbar.

Click its icon, a pop-up windows shows.


You have many options:
- Upload image
- Drop an image file
- Right click on the image to add image
- Choose browser area (drag to draw a target area)

What is not good is when I clicked 'Choose browser area', a pop-up window did not disappear so I couldn't draw an area that was behind it. 


I did a right click at an image and selected 'Image to Text'.

The add-on was working.


 The extracted text.


The target image.


You can copy the extracted text by clicking a botton 'Copy Text'.


You had better test them yourself -- your task, your time.

The test steps -  Image to Text 1.0.0 by frank.shikhaliev
OS: Windows 11 Home
Install from Chrome web store website: https://chromewebstore.google.com/detail/image-to-text/jfpipjgidnagjbmdfhogcoklclacgnhk?hl=en

2024/05/10

Extract Text From The 'Scrolling Capture' Image FREE on Windows 11

Because the screen to text app can not do a scrolling capture and extract text from the image, I have to find the app to do this job.


TEXTEMAGE is the first app I want to talk about.


The test steps -  TEXTEMAGE 1.4
OS: Windows 11 Home
Download from the developer's website: https://github.com/Akascape/TEXTEMAGE/releases


1. Download a file from the link above. I downloaded
Textemage_v1.4_win64.zip


Unzip the downloaded file, then you will have a folder 'Textemage_v1.4_win64', open it, open a folder 'Textemage'

Open a file 'Textemage'. You might see the window that is like the picture below.


Click 'More info'.

Click 'Run anyway'.

The program window.

Drag and drop an image to the box.

Click 'EXTRACT'.

The result in the right pane is unacceptable, so I changed the image.

The image is column with text.

The result is pretty good.

So I clicked at the result box and pressed Ctrl+A to select all.

Then copied it.

The test steps -  TEXTEMAGE 1.4
OS: Windows 11 Home
Download from the developer's website: https://github.com/Akascape/TEXTEMAGE/releases

I have found an app to extract text from the image that TEXTEMAGE failed to execute. It's called 'Image Scan OCR' on Microsoft Store. 

It's free.

The test steps -  Image Scan OCR 1.0.12.0
OS: Windows 11 Home
Download from Microsoft Store

1. The program window is above.


Drop an image to the middle pane.


The extracted text shows in the right pane.


I clicked 'Wrap Text' in menus but nothing changed, so I did it again.


The extracted text was arranged in one column. The image has 2 columns


I clicked 'Copy All' and pasted it to Notepad

Version of the app

The test steps -  Image Scan OCR 1.0.12.0
OS: Windows 11 Home
Download from Microsoft Store

2024/03/19

Atom (FREE!) - Delete Multiple Characters at Once with 'Multiple Cursors' on Windows

The input in this post is from the output of 'Snipping Tool'.


Converting newspaper image to text, the result are columns, sometimes there are many hyphens joining words between lines. If you convert a column to single line, you do not need those hyphens.


 'Multiple Cursors' of Atom comes to help in this case.


The test steps - Atom 1.60.0 ia32
OS: Windows 11 Home
Download from the developer's website: https://github.com/atom/atom/releases


1. Go to the link above, then expand the 'Assets' section of the target version, then click to download a version for Windows.


Unzip the downloaded file. There are 2 folders, open folder 'Atom'.

Open file 'atom'. There are tabs -- 'Welcome' and 'Welcome guide'. You can close them.

2. Click menu 'File' --> 'New File'. Save it.

Past text.

In the picture above, you will see hyphens.

After the lines are joined ,there are hyphens. If you want to know how to join lines with Atom, read my previous post. -->  https://windowsfreewareguide.blogspot.com/2024/03/atom-free-join-multiple-lines-on-windows.html


You might want to wrap text to make things easier. Click the line number to select that line.

In the picture above, from line 2 to the last line were joined so I clicked line 2 to select. Then click menu 'View' > 'Toggle Soft Wrap'.

The result is below.


In the picture above, I will show you how to delete space and hyphen in intimi- date. And Emer- gency and others.

Change the current position of the cursor to the right place. In my case, I placed the cursor before character 'd' of intimi- date.


Then hold Ctrl key while clicking to place the cursor at other positions. The result is below.

Then I pressed Backspace key two times. The result is below.

Press Esc key, there will be one cursor.

The current position of cursor is the first position before the 2nd cursor is placed.


With the power of this code editor you can get it done fast.

The test steps - Atom 1.60.0 ia32
OS: Windows 11 Home
Download from the developer's website: https://github.com/atom/atom/releases